

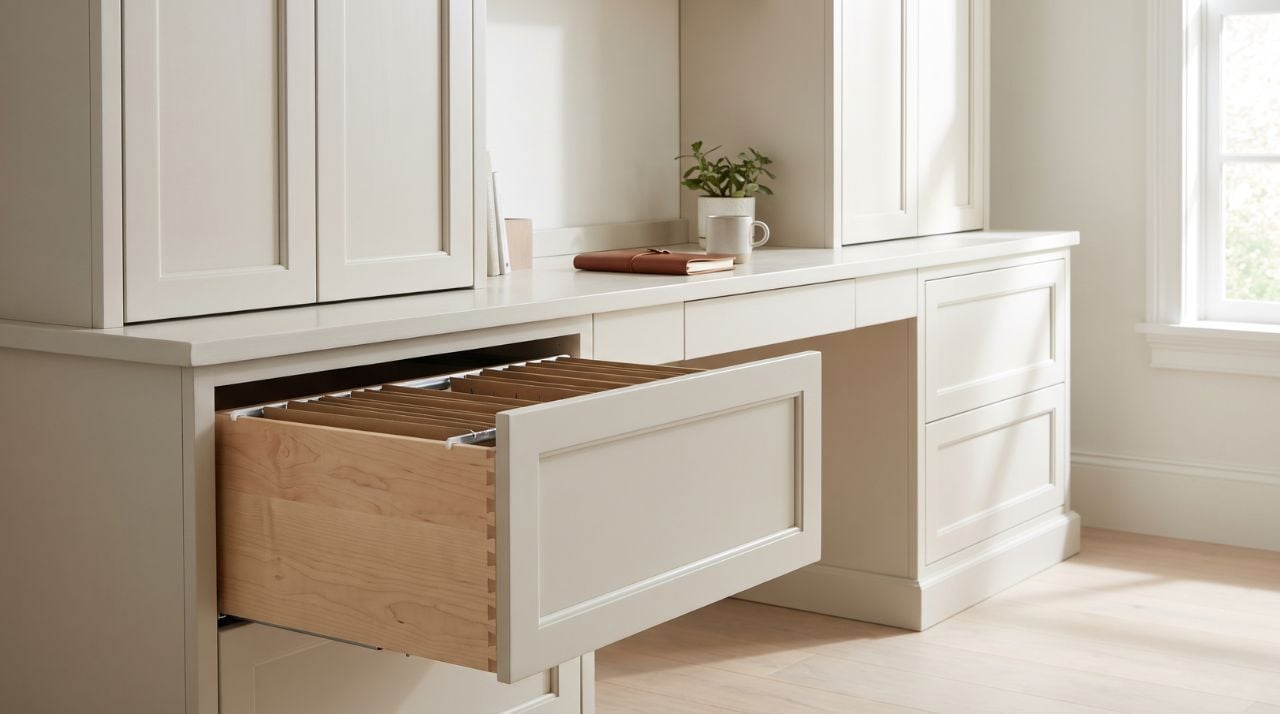
Office Built-Ins: Component Specs for Doors and Drawers
A client's office built-in usually reaches the shop as a wall sketch and a wish list: hanging files, printer paper, somewhere to put the laptop bag. Turning that into an order means sizing the doors, drawer fronts, drawer boxes and hardware as separate items that still fit one cabinet plan. Record measured openings, component dimensions, filing needs, and hardware on one schedule to ensure every door, drawer front, and box fits into the overall plan.
In this article:
- Build an office built-ins specification from site measurements
- Convert finished openings into door and drawer sizes
- Specify filing storage before fixing drawer dimensions
- Expert Eagle Insight
- Coordinate slides, hinges and operating clearances
- Check the component schedule and installation sequence
- Order from the approved office component schedule
- Frequently Asked Questions
Build an office built-ins specification from site measurements
Start with what the client will store, then measure the room. An elevation can look right on paper and still put the file drawer where the client's knees go.
Ask to see the actual contents. Count the hanging files and note whether they're letter or legal. Measure the tallest item headed for each shallow drawer. Find out what will live behind doors and how often it comes out, since daily-use items belong near the seat and archive boxes can sit high or at the far end of the run.
|
Storage use |
Contents to verify |
Specification fields it drives |
|
Everyday supplies |
Tallest item, how many drawers, how often they're opened |
Usable interior height, drawer location relative to the seat |
|
Hanging files |
Letter or legal, folder count, which way folders should face |
File format, bar direction, box height, slide model and load rating |
|
Closed-door storage |
Item sizes, what sits behind each door, frequency of use |
Door size, overlay or inset, hinge setup, any drawer behind a door |
Next, record the room and the cabinet plan as separate sets of numbers:
- Wall and run dimensions, including out-of-square corners and obstructions such as outlets, vents and window casing
- The cabinet layout: face frame or frameless construction, carcass sizes and the desk surface height
- The finished opening for every door and drawer, taken after the cabinet structure and any obstruction are accounted for
Order sizes come later and are calculated from that third list, so give each set its own column on the sheet.
Before you fix the storage layout, sit where the client will sit. OSHA's workstation clearance guidance calls for enough open space under the work surface to change posture, with files, computer towers and other stored items kept out of it, and it puts frequently used equipment in the primary reach zone. Mark the chair position, the knee and foot zone, the keyboard and mouse area, and how far each drawer or door travels into that space.
For the site visit, bring a tape, a square and level, a labeled elevation sketch, a camera for site photos, details of any existing hardware, and the installation sheets for the slides and hinges you plan to use.
Convert finished openings into door and drawer sizes
Every opening with a drawer produces at least two order lines: the drawer box and its applied drawer front, and each door adds its own. Give each opening a location code, such as DSK-L2 for the second drawer in the left desk pedestal, and carry that code onto every line that belongs to the opening. The code keeps a box and its front tied together when they sit on different forms and arrive in different shipments. When you order with us, for example, drawer boxes go on the Drawers Order form, and drawer fronts go on the Doors Order form with the line Type set to Drawer Front.
Each line carries the actual product size: on our forms, you enter the outside drawer-box size or the finished door or front size in inches, to the nearest 1/16 inch.
Doors and fronts take their size from the opening and the overlay your cabinet plan sets. For a single overlay door or front, add twice the overlay to the opening width and twice the overlay to the opening height. A pair of doors on one opening subtracts a center reveal, typically 1/8 inch, from that total width before dividing it by two. Inset work runs the other direction: our reference subtracts 1/4 inch from the opening's width and height, leaving a 1/8 inch gap per side, so a 16 by 34 inch opening takes a 15-3/4 by 33-3/4 inch door. Confirm the reveal against the hinge system you've chosen before you lock it in. Our door and drawer-front measuring instructions work through the overlay and split-door math in more detail.
Drawer-box width is the opening minus a slide deduction. A 16-1/2 inch opening with 1/2 inch drawer sides on our Blum-based undermount setup loses 5/8 inch, giving a 15-7/8 inch outside box width. The same opening with 5/8 inch sides loses 3/8 inch, and our sidemount deduction is 1-1/16 inch whatever the side thickness. Height comes down by at least 13/16 inch for undermount and 1/2 inch for sidemount. Depth is its own calculation, tied to the slide length and rear clearance covered further down.
For supply drawers, check usable height as well: the outside box height you order is larger than the space inside it, because the bottom sits in a groove. On our standard box, subtract the 1/2 inch bottom recess and the bottom thickness: a 3.5 inch box with a 3/8 inch bottom leaves 2.625 inches of usable height. Hold that figure against the tallest item from your site notes, whether that's a stapler, a label maker or a stack of sticky-note pads.
Specify filing storage before fixing drawer dimensions
Hanging files set a drawer's height, its width or depth, and the slide rating it needs, so settle the filing spec before you set the pedestal openings. You need three answers from the client first: letter or legal, roughly how many folders, and which way the folders should face.
With bars running front-to-back, folders face the front of the drawer like a standard file cabinet; with bars running side-to-side, they line up across the drawer and their tabs read from the side. Our file drawer comes as one configured unit for letter or legal files, with H1 as the front-to-back option and H2 as side-to-side, and you can compare them on our letter and legal file-drawer options page.
The minimum height for that unit is 9-7/8 inches, and the file bar extends 3/8 inch above the drawer. The outside box height you order leaves out that projection, so the opening has to clear the bar plus the folder tabs riding on it.
Put these on the schedule for every file drawer:
- File format and bar direction
- Drawer side thickness
- Outside box width, height and depth, confirmed for that format and bar direction
- Clear space above the bars for the bar projection and folder tabs
- Slide model, nominal length and load rating
- Access at full extension, including the back row of folders
Record extension and load rating as separate fields: full extension lets the client reach the last folder, and the rating comes from the manufacturer's data for the exact model and length.
Expert Eagle Insight
Before anyone sizes a file drawer, settle four things in this order: the paper size, the bar direction, the side thickness, and the slide. Letter needs an outside box width of at least 13-3/8". Legal needs 16-3/8". Two rows of letter folders need the width for it; a narrower box is built with a single row, so say which you want. The bars run front to back or side to side. The bar stands 3/8" above the box, so the opening needs that room on top of the normal height deduction. Side thickness sets the width. With undermount slides, a 1/2" side takes 5/8" off the opening and a 5/8" side takes 3/8". Take at least 13/16" off the height and leave about 1/2" behind the box. The depth follows the slide length. A full file drawer is heavy, so pick a heavy-duty slide. Order the box size, never the opening.
- On the component schedule, most mismatches come from two sizing rules sitting side by side. A drawer box is the opening minus the slide deduction. A door or drawer front is the opening plus twice the overlay, or minus 1/4" for inset. So a front that matches its box width is wrong. Check that every drawer opening carries two lines: a box on the drawers order and a front on the doors order. Check that doors and fronts on one run share the same cabinet type and overlay. Check that no drawer front has hinge boring; fronts never do. Check that slides pair with boxes and hinges with doors, and that the slide length does not exceed the box depth. Check that species and finish are called out per line, since doors arrive unfinished unless primed and drawer boxes arrive lacquered. Then read the acknowledgement. It names any rail or stile we stepped down on a short front, and that is the size the part will be.
Coordinate slides, hinges and operating clearances
Pick the exact slide before you approve a single drawer size. Record the model, the nominal length, the box preparation it needs, such as a notch and bore for undermount slides, and the cabinet depth available behind the drawer. Our undermount width deductions are based on Blum slides, so with any other make, the manufacturer's spec sheet sets the numbers. For rear space, our reference allows about 1/2 inch behind an undermount drawer and about 1/4 inch behind a sidemount drawer. When you add slides to a drawer order with us, you choose the slide type and we assign the slide item and quantity from each drawer's depth.
Ratings vary even inside one slide family: Blum's MOVENTO product specifications describe full extension as access to the back of the drawer and list static load ratings of 125 lb and 170 lb, each offered across its own range of nominal lengths (as of October 2026). Choose slides based on both the required length and load capacity. Keep in mind that the slide rating applies only to the slides, so the drawer bottom, fasteners and cabinet must also be able to support the intended load.
For every door, record face frame or frameless construction, the actual overlay or inset, the hinge boring and the hinge count. On our Doors Order form, you select the cabinet type and overlay style, and we recommend the boring and hinges and set the quantity from each door's size. Drawer fronts are never bored, so a front line carries no hinge information at all.
Closed-door storage often hides a drawer, and that's where clearances get tight. If door hinges protrude into an opening that also holds a drawer, deduct the protrusion from the opening on top of the slide deduction, or plan blocking on the hinge side so the slides clear the hinge hardware. Then walk the travel path on the elevation. Look for fronts that swing into a side wall, pulls that collide at an inside corner, and drawers that extend into the chair zone you marked on site.
Check the component schedule and installation sequence
Give each line on the schedule these fields:
- Location code and item type (door, drawer front or drawer box), with quantity
- Verified finished opening
- Order width and height for doors and fronts; order width, height and depth for drawer boxes
- Material and drawer side thickness
- Hardware model and box or door preparation
- File format and bar direction, where it applies
- Finish responsibility and project notes
Here's how one location reads with both of its lines filled in, using the earlier example and a 1/2 inch overlay:
|
Location |
Line |
Opening width |
Order width |
Setup |
|
DSK-L2 |
Drawer box |
16-1/2" |
15-7/8" |
1/2" sides, Blum undermount, notch and bore |
|
DSK-L2 |
Drawer front |
16-1/2" |
17-1/2" |
1/2" overlay, no hinge boring |
Cross-check each location across the elevation, the box line, the front line, any door line and the hardware spec. Once the quote and order acknowledgement arrive, compare their dimensions against the schedule line by line. Our three-person order review catches entry errors, but fit against the built cabinet is a field check: you're the one who can confirm the cabinet box dimensions and face frame thickness against what's on the order.
Our drawer boxes ship with a clear lacquer finish unless you request them unfinished, and our doors and fronts ship unfinished or primed, so the finish-responsibility field names your shop or your finisher for any paint or stain. Plan the install date around the current lead time on your quote and acknowledgement.
On site, work in this order:
- Confirm the cabinet structure is complete and recheck the finished openings against the schedule.
- Check each component against its location code as it arrives. With our orders, hardware ships separately and usually arrives before the boxes and doors.
- Mount slides and hinges to the manufacturer's instructions.
- Install the drawer boxes, then attach the drawer fronts and hang the doors.
- Adjust, then test drawer travel, reveals, filing access and chair clearance with the drawers fully open.
Order from the approved office component schedule
Once every location checks out, submit the drawer boxes from the schedule, with the matching door and front lines reconciled against the same location codes and the hardware selections noted on each line. Eagle Woodworking builds custom dovetail drawer boxes for your project to the sizes on your schedule, and with no minimum order, a single desk pedestal gets the same attention as a full wall of storage.
Frequently Asked Questions
What measurements do you need for office built-ins?
You need the client's storage contents, the seating and work-surface clearances, the confirmed cabinet plan and the finished opening for each door and drawer. Use the finished openings to calculate the order dimensions for each door, drawer front and drawer box, accounting for the selected slides and hinges.
Are drawer fronts included with drawer boxes?
No. A drawer box and its applied drawer front are separate products with separate order lines. With our orders, fronts go on the Doors Order form with the line Type set to Drawer Front. A shared location code on your schedule keeps each box matched to its front.
What should you specify for a letter or legal file drawer?
Specify the file format, letter or legal, and the bar direction, front to back or side to side. Give the drawer side thickness, 1/2" or 5/8", and the outside box dimensions confirmed for that configuration, to the nearest 1/16". The file bar stands above the box, so allow for that in the opening on top of the normal height deduction. Choose the slide type with the weight of a fully loaded file drawer and access to the back folders in mind.
How much clearance do office drawer boxes need?
It depends on the slide. Our undermount reference takes 5/8 inch off the opening width for 1/2 inch sides and at least 13/16 inch off the height, with about 1/2 inch behind the drawer. Check the exact model's spec sheet, and deduct any hinge protrusion into the opening.
How do you coordinate doors, fronts and drawer boxes before ordering?
Give each opening a location code and list every door, front and box under it with its own order dimensions, quantity, overlay or reveal, and hardware preparation. Cross-check each code across the elevation and the order lines, then confirm fit against the built cabinet before you approve.